
DIY Guide: How to Conduct a Basic Asbestos Check in Your Home for Safety
Master Safe DIY Asbestos Testing in Austin, TX
Protect Your Family With Simple Safety Steps
Why Testing Matters Before It’s Too Late
If you live in one of the older neighborhoods around Austin, there’s a good chance your home was built when asbestos was still a standard construction material. Homes from the 1950s through the mid-1980s frequently contain asbestos in everything from insulation to flooring, and the hot, humid Texas summers can gradually degrade these materials over time.
Asbestos becomes dangerous when it’s disturbed or deteriorates, releasing microscopic fibers into the air you breathe. These fibers can lodge in lung tissue and cause serious health problems years or even decades later. The tricky part is that you can’t see or smell asbestos, and symptoms of exposure often don’t appear until long after the damage is done.
That’s why early detection is so important. A basic home check helps you identify potential asbestos-containing materials before they become a hazard. Once you know where these materials are, you can monitor their condition, avoid disturbing them during renovations, and make informed decisions about professional testing and removal. Catching potential asbestos early saves you from costly emergency abatement and protects your family’s long-term health.
Common Hiding Spots in Older Homes
Knowing where to look is half the battle. Asbestos was used in so many building products that it can feel overwhelming, but a few key areas account for the majority of cases in residential homes.
Start with your attic and any exposed insulation around pipes or ducts. Homes built in the 1970s and early 1980s around Austin often have vermiculite insulation, which may contain asbestos. This insulation looks like small, pebble-like pieces and is usually gray or silver. If you see it, don’t disturb it; just note its location.
Next, check your flooring. Vinyl floor tiles, especially 9×9-inch squares, and the black mastic adhesive underneath them frequently contain asbestos. If your home has original flooring from the 1960s or 1970s, there’s a strong possibility it’s there.
Popcorn ceilings are another common spot. Many Austin-area homes still have textured ceilings installed before the mid-1980s, and these often contain asbestos fibers mixed into the spray texture.
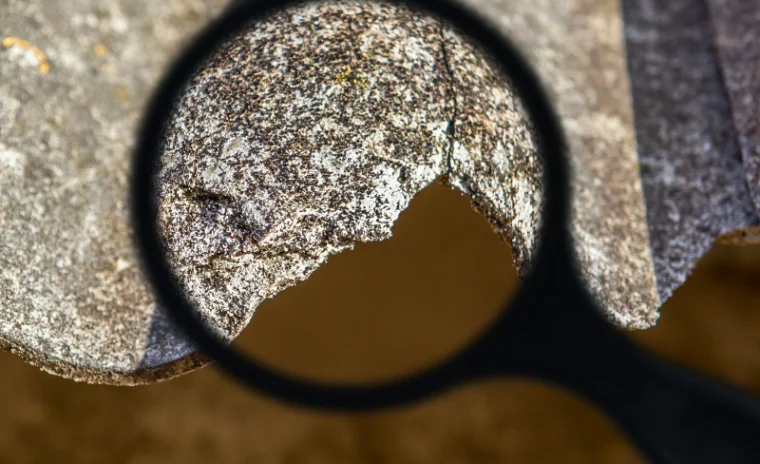
Don’t forget roofing materials, cement siding, and the wrap around older heating pipes in basements or crawl spaces. Transite pipes and corrugated roofing panels are other suspects. The key is to look without touching. Asbestos is only hazardous when fibers are released into the air, so leave suspected materials undisturbed and document what you find with photos. Always remember that a visual check cannot confirm asbestos; only laboratory testing by a certified inspector can do that.
Your DIY Inspection Checklist
Conducting a basic asbestos home check is about observation, not interaction. You’re gathering information, not collecting samples. Here’s how to do it safely and effectively.
First, gather your materials. You’ll need a flashlight, a camera or smartphone, a notepad or digital notes app, and a ruler or tape measure. Dress in clothes you don’t mind getting a little dusty, but avoid anything that might create static or disturb surfaces.
Start your inspection in the attic or any areas with visible insulation. Shine your flashlight around pipes, ductwork, and any loose-fill insulation. Take photos from a safe distance without touching anything. Note the color, texture, and location of any suspect materials.
Move through each room of your home, checking floors, ceilings, and walls. Pay special attention to areas with older materials that haven’t been updated. If you have popcorn ceilings, photograph them from below. If you see 9×9-inch floor tiles, snap a picture and note the room.
Document everything clearly. Write down the location, approximate age of the material, and any visible damage like cracks, crumbling, or water stains. Do not scrape, sand, or break any materials to test them. That’s when asbestos becomes airborne and dangerous.
Know when to stop. If you encounter materials that are already damaged, deteriorating, or releasing dust, back away and call in professionals immediately. Your DIY check is a first pass, not a substitute for professional testing. Once you’ve completed your visual survey, review your notes and photos to decide which materials warrant laboratory analysis. If you’re uncertain about any findings or your home was built before 1985, it’s time to contact a certified inspector.
When to Call in the Professionals
There are clear signs that your DIY check should end and professional testing should begin. Recognizing these red flags protects you and your family from unnecessary exposure.
First, any visible damage is an immediate trigger. If you see crumbling insulation, cracked floor tiles, peeling pipe wrap, or flaking ceiling texture, stop your inspection. Damaged asbestos-containing materials can release fibers into the air, and further disturbance only makes it worse.
Friability is another key indicator. Friable materials can be crumbled by hand pressure, meaning they easily release fibers. If a material looks powdery, brittle, or is shedding particles, treat it as hazardous and keep your distance.
Age and material combinations matter, too. If your home was built before 1985 and you’re planning any renovation work like removing flooring, tearing down walls, or scraping ceilings, you need testing before you start. Even if materials look fine, disturbing them during construction can create a serious health risk.
Finally, if you simply don’t know what a material is, don’t guess. Visual inspection alone cannot confirm whether something contains asbestos. Only laboratory analysis of a sample collected by a trained professional can give you a definitive answer. Asbestos Consulting and Environmental offers professional asbestos inspection services throughout the Austin area, including safe sampling and lab-certified results. When you see these red flags, it’s time to bring in the professionals who know how to handle the situation safely.
Your Next Steps if Testing Confirms Presence
Finding out your home contains asbestos can feel stressful, but knowing the problem exists is the first and most important step toward solving it. Once professional testing confirms asbestos, you have options, and none of them require panic.
If the material is in good condition and not likely to be disturbed, the safest approach is often to leave it in place and monitor it. Asbestos that’s intact and undisturbed poses minimal risk. Your inspector can help you create a management plan that includes periodic checks and guidelines for avoiding disturbance.
If the material is damaged or you’re planning renovations, removal or encapsulation becomes necessary. Abatement is a specialized process that must be handled by licensed contractors who follow strict Texas and federal regulations. Costs vary depending on the type and amount of material, but investing in proper abatement protects your family’s health and your home’s value.
In Texas, asbestos abatement projects require notification to the appropriate regulatory agencies, and all work must meet state and EPA guidelines. Your abatement contractor will handle these requirements, but it’s helpful to understand that this process is tightly regulated for good reason.
Once abatement is complete, you’ll receive clearance testing to confirm the area is safe. You can then proceed with renovations or simply enjoy the confidence that your home is free from this hidden hazard.
If you’ve completed your DIY home check and want professional confirmation, or if you’ve spotted any of the red flags we discussed, Asbestos Consulting and Environmental is here to help. Serving Austin and surrounding areas, we provide certified inspections, lab testing, and straightforward guidance on your next steps. Give us a call at 5125655653 or email aceofaustin04@gmail.com to schedule your inspection and get the answers you need.
